
Hold Fast
Venturi Upgrade Kit
Update your old vacuum system
Call for direct pricing and delivery: 770-631-7897
The new V811 provides more vacuum and volume than our previous models. The updated venturi allows the front panel regulator to act more like a stereo volume - the more you turn it to the right, the more the vacuum and the pressure increase (up to 80 psi). Most air compressors cycle back on at about 80 psi - which makes it ideal for this system.
Note: Our latest V810R already has this update. The older High Performance generators also have four venturi and perform like this new single venturi system.
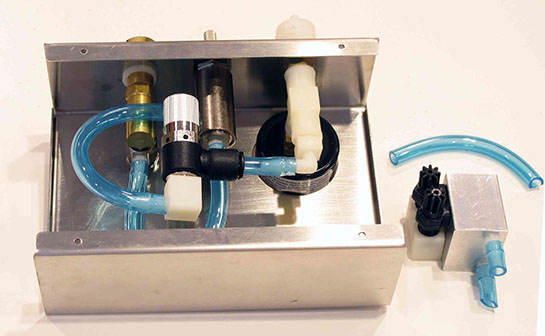
We have two styles of vacuum generators that can be updated. First we will show our current model that uses a manifold to attach the two old style vacuum venturi. Most likely this model is in a Stainless Steel case.
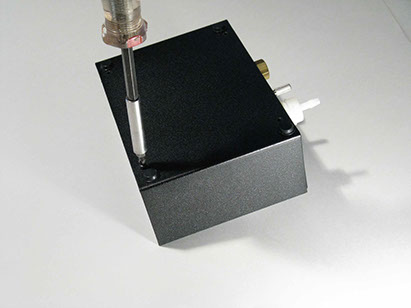
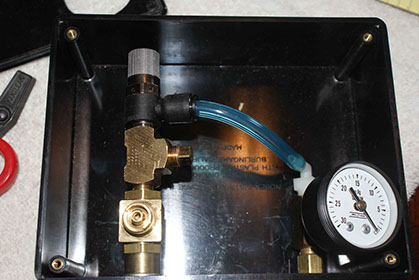
The older style vacuum generator has a Black painted case and a brass T attachment.
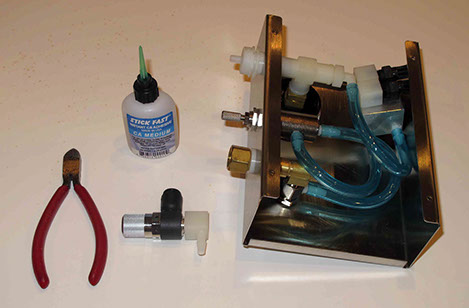
Parts and Tools needed. Venturi with Attached Elbow Barb included in kit. Note: kit includes more items - but this should be all you need for this model.
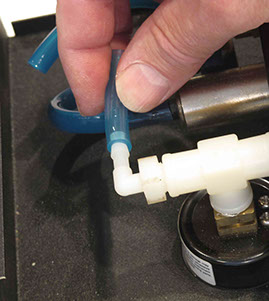
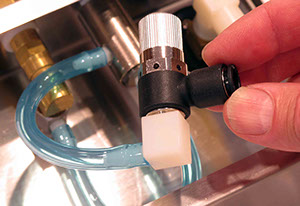
How to Convert a Newer Model with a Manifold
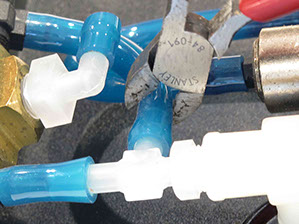
Step 1: Cut or pull both hoses off manifold. Keep hoses as long as possible. Hoses may be glued to hose barbs.
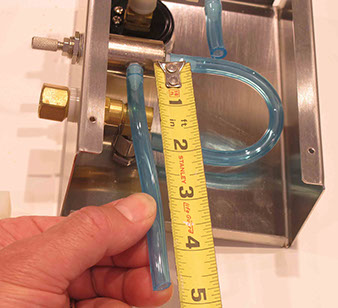
Step 2: Cut this hose to 1-1/2" long

Step 3: Cut this hose 4" to 5" long - it may already be that length after cutting from manifold
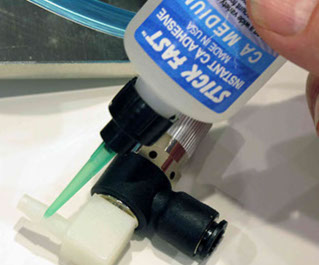
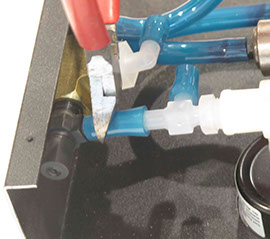
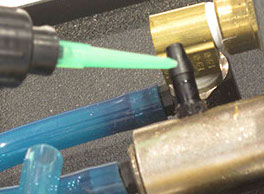
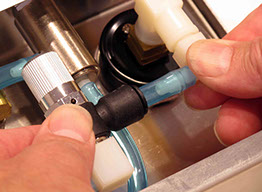
Step 4: Put just a drop of CA on hose barb to keep hose on. Press hose onto hose barb.
Note: Hose barb will swivel on venturi.

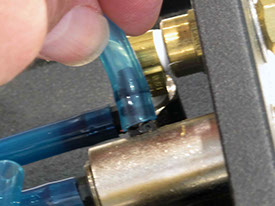
Step 5: Press short hose into fitting until it bottoms out. Note: to release hose from fitting depress the collar and pull hose out.

Check to make sure hoses are secured. You are now complete!
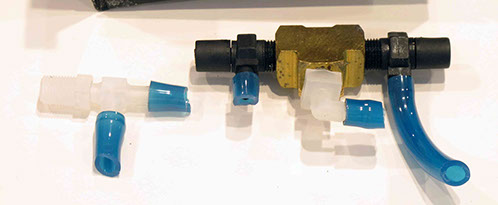
How to Convert Older Models with a Brass T Mounted Venturi
(do you have the model with the old ball valve? Scroll down!)

Parts and tools needed. Venturi with attached elbow barb, 2 hoses, and elbow barb--all included in kit

Step 1: Remove or cut hoses from two black venturi and hose barb elbow that are attached to the brass T.
Step 2: Remove branch T
Shown: all parts removed
Step 3: Install Hose Barb Elbow and press on supplied 1-1/2" hose

Step 4: If hose coming from the regulator is not 4"-5", remove hose, apply CA to barb, press on supplied 4"-5" hose

Step 5: Put just a drop of CA on hose barb to keep hose on. Press hose onto hose barb. Note: hose barb will swivel on venturi

Step 6: Press short hose into fitting until it bottoms out. Note: to release hose from fitting depress the collar and pull hose out.
Step 7: Check that all hoses are secure. You are now complete!
Older Models with a Brass T Mounted Venturi
How to Convert Original Ball Valve Vacuum Generator
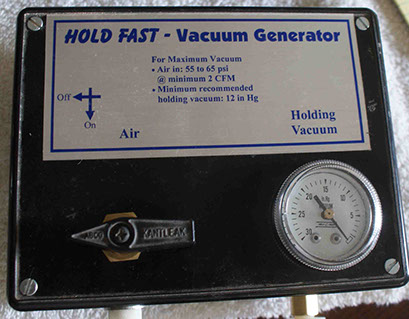
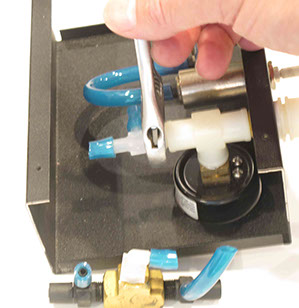
Generator with cover off. Note: steel case will look different. You may not have to take the handle off the ball valve.
Step 1: Remove hoses, both black venturi, and fittings.
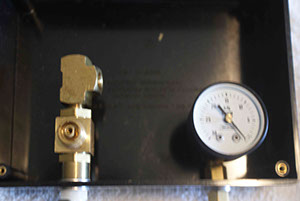
Step 2: Plug in side of T. Screw Venturi into the T without the white hose barb. Install elbow hose barb at the gauge. Attach the vacuum hoses.
Note: Set air pressure to 70-100 psi; ideal is 80 psi.
The amount of vacuum can be controlled by how much you open the ball valve: all the way open = full vacuum; partially open = less vacuum.
Completed Ball Valve Vacuum Generator
Congratulations! You've updated successfully the Ball Valve Vacuum Generator System.